s

p

Dining room built ins

Hello my friends! How are you? My sister-in-law and nephew have been here all week and this is our last day with them. I’m excited we have a sunny day (I think ALL day) to do something fun!

In celebration of two anniversaries recently – ten years in our home and my blogging anniversary – I’ve been sharing the progress of some of the rooms in our home over the years. By the way, I totally forgot about my blogging anniversary when it hit – six years at the end of May. Whoot!!

I ALWAYS struggled with our dining room. I don’t know why. Part of it was that shortly after we moved in I marched myself to the furniture store and bought a complete set of dining furniture. I liked it OK – but I wasn’t madly in love with it. I just wanted to fill the space. Now I know better and would wait it out, but you know how that goes.

Long ago I added molding to the walls (with Liquid Nails! No.) and jazzed up the ceiling:

I also recovered the seats of the chairs almost immediately to add some color to the room. It was very beige/brown.

You’ll see here that this was my gold and red phase as well. Ah yes…

I still wanted some more contrast so I changed up the drapes and added a solid red to the bottom:

two tone drapes

Then things just got crazy and I painted the whole room (the entire. room.) brown:

brown dining room

You know, looking back, I don’t hate it. It was dramatic and pretty – I say you can go dramatic in two rooms safely – the powder room and the dining room. Or all the rooms, it’s your house.

I always struggled with the fact that this room opened up to our two story living room so I just added a piece of trim down the wall to separate them. Probably a major design crime but you know, I like to live on the edge.

But the thing is…it was DARK. Shocking, I know!:

brown dining room

I didn’t mind it much till we had new floors put down after a water issue. Then it was positively cave-like. Dark on every surface in the room and I couldn’t take it anymore.

A new idea formed in my head over time that I talked about here. I was tired of not using this space. I wanted to make it more functional and change up how we used it.

So the DIY built ins began:

how to build built ins

You can see the synopsis of how my Dad and I built them here. It wasn’t hard, just time consuming. It took me forever to get them finished – eight months total I believe.

I had a design in my head all those months of thinking about it and a big part of that design was lights at the top of the bookcases. It took months to find something that was affordable but I finally found what I wanted in the outdoor section:

inexpensive library lights

And now…I love it. This room is one of my favorites in our home.

I could not be more pleased with how it turned out:

DIY built ins

It’s been about a year and a half since they were finished and they are holding up great. I’m really proud of Dad and I for tackling it. :)

Funny thing is, the plan all along was to put a coffee table and four chairs in here, but we moved our old kitchen table in here a year or so ago and it’s become my husband’s office in the summer months:

dining room built ins

He has a basement office but can’t stand to be down there without natural light in the summer. So although his stuff laying around kind of drives me batty, I love that we’re actually using it. Many of you have suggested adding a more casual table back in here and the idea is growing on me. Plus, finding four matching (comfy) upholstered chairs is so dang expensive!

I can’t forget the other view of the dining area – it’s really more of a landing/hallway of sorts. I found this before shot of our stairs that I didn’t know I had:

And I showed you this more recent after here:

wood staircase

Such a difference! (Here’s the how to on pulling the carpet off of stairs.)

Many of you have asked how much I spent on the built ins and I’m not positive of the cost because we did them over such a long time. The kitchen cabinet bases were $320 total and the butcher block from IKEA was $130. I’m guessing we put in another $150-200 in trim and wood (I used basic pine wood for the actual bookcases). And the lights came to $140. So a rough estimate is about $750-800 for 12 feet of built ins.

I would have paid three times that to have them done. Easily.

So there’s a look back at what is now one of my favorite spaces in our home! It was one of my problem children before though. :)

Do you have a dining room? Do you use it? Have you considered changing up how it’s used?

P.S. Check out my tips on decorating bookcases in this post.

Have a great weekend!

Updated 80’s light fixture

Hey hey! I’m back with a project that I let sit around for nearly two years. It’s been moved around the house – the garage for a while, then it’s future home (the dining room/library) for the past year or so. Just sitting there. For a year.

It was time. I found this light fixture at the Habitat Restore almost two years ago, even before I finished up the bookcases in the dining room:

painting brass light

It was $20 and I loved the shape so I snagged it up!

I think the main reason I let it sit so long was the work that I knew would go into transforming it. Meaning taping all that off to paint it. Bleh. Not fun.

I pulled out my rub n buff first, thinking I may be able to get away with no taping off and spray paint. But the dark color I had was dried as hard as a rock, I couldn’t get any out of the tube. Wah wahh. So I knew I’d have to spray paint it. I did consider just leaving it – the brass didn’t horrify me. :) But I wanted it to stand out more and I knew a darker color would make that happen. And the brass looked fine in some areas and horrible in others, so it needed to be covered.

It came apart into two pieces and I cleaned it well:

painting brass light fixture

This one helped:

Then it was time to tape all that off. I came up with an idea that helped though! I just laid the painter’s tape down over the glass and then used my razor to “cut out” each one:

taping off glass on light fixture taping off glass on light fixture

It worked GREAT. I timed myself and it took one hour and 15 minutes to tape off the whole thing:

taping off glass on light fixture

That’s 64 sections in one hour and fifteen minutes, so not too shabby! And when you’re sitting in front of the TV watching Flipping Out the whole time it’s really not too bad. :)

About half way through I realized the inside would still be brass, but you pick your battles. No way was I going to try to do the inside. So it’s still brass, but you can’t even tell.

I took it and the smaller pieces outside (YAY for spray paint weather!!) and primed them with black primer, then sprayed them in oil rubbed bronze spray paint (I’ve tried them all and all look great). Then I hung the light part in the garage and sprayed it the same way:

spray paiting a light fixture

Those white sleeves were brittle and falling apart so I just kept them on to protect the electrical stuff while I painted.

By the way, I don’t always prime my metal light fixtures – it’s not something that’s going to get wear and tear. But I was almost out of my ORB spray paint so I wanted to make sure it had a dark base.

When the parts were dry to the touch (about an hour later), I installed it inside:

painted 80's brass light fixture

The chandelier we’ve had in here has looked odd to me since we started the transition to a library instead of a dining room. (Read more about that here.) Our old kitchen table still sits in here, only because we haven’t made the new furniture a priority. (Four matching chairs isn’t going to be cheap!)

Anyway, the old light was too detailed for this space and I wanted something a bit simpler. I think the darker paint makes this light look a million times better!:

DIY bookcases

Eventually I may get something else (I’ve had my eye on another light for a long time now) but for now the $20 one that’s been laying around for years works GREAT. :) I won’t do anything until we get the furniture for this space anyway.

Part of the reason I finally got this done is because I’ve been wanting to move the chandelier that was in dining room to the bedroom:

pottery barn light from home depot

I’ve had another Habitat light up there for years but I wasn’t loving it anymore – and it was just a place holder till I could get a chandelier in there. :) This worked out perfectly!

The chandelier was from Home Depot and I got it because it was so similar to the Pottery Barn version, for about $200 less:

img73c 5450f114-4a75-4e08-a540-aa5969a5cf1b_300

(PB: source, HD: source)

I LOVE this light! It is gorgeous in the master bedroom:

chandelier in bedroom I’ve been planning to use this one in there since I finished up the bookcases in the library, so it’s nice to finally get it installed!
So there you go – a $20 light, spray paint season is BACK and a little light switcharoo! I feel like I got two lights for less than $25 – I had to get new white sleeves for the dining room light so that added a few bucks. And when you buy the light two years ago, does that even count? :)
Have you spray painted a light fixture lately? It’s amazing what paint will do to help update them!

Dining room (pretty) organization

Hey hey! How the heck are ya? There are some beautiful projects linked up at the before and after shindig – check it out here to see them or link up yours!

Today I’m back in the dining room – or is it the library? This room is a little confused right now. :) Last year we decided to do away with our dining room (that we used twice in seven years?) and make it into a more functional space for us. I shared the progress on this DIY built in project early last year and the final result here. The “book” part of the library is done…but we still need a cozy place to sit.

I love the built ins for so many different reasons, but one of the BIGGIES is all of the glorious storage they provide:

DIY built ins cabinets as bases

I chose to use upper kitchen cabinets as the bases, which I’ve done a couple times elsewhere in the house. They aren’t nearly as deep as a regular cabinet base (12 inches instead of 24), but I knew they would still provide plenty of storage.

I use this area for most of our serving stuff – the items we don’t use every day or even every week, but I like to have it all for special occasions/holidays/parties. You know – all that pretty stuff you hardly use but still need (want)?

When I finished the built ins I was so excited I just shoved everything back into the cabinets and called it done. For a long time now I’ve been wanting to clean them out, purge some of the stuff and pretty it up just a tad.

I started by pulling every single item out of the cabinets. You know, the whole it gets worse before it gets better thing? Yeah:

decrapifying

Well the dog wasn’t in the cabinets, of course. He just has to be in front of the camera every. single. time.

And this is another reason the room is still in limbo – the table and chairs from the kitchen were moved in here temporarily and have stayed. Hubby sits here to work most days lately instead of the basement so we’ve kept it for now. I’m itching to get those comfy chairs in here though. :)

So I cleaned them out and then cleaned them out – vacuumed all the leftover sawdust (nice) and wiped them down:

Side note – no I don’t paint the insides of the doors. SOMEONE (me) doesn’t have the patience for that.

I pulled out the top shelf in each one to cover them with some cute contact paper I had picked up for this project a year ago:

contact paper on shelves

But I ran out of it before I could do the bottom shelves. I was just going to leave them as is but it looked wonky. Sooooo I quickly taped them off and did one coat of the color I used on the backs of the built ins – Storm Cloud (I think it’s Sherwin Williams?):

label cabinet doors before painting

Do you see that little piece of Frogtape on the back of the door? That’s been there all this time – I used those to number the doors when I took them off to paint them. I highly recommend doing that because otherwise you’ll have to do a lot of adjusting to get the doors just right again.

Anyhoo, did I need to paint the inside the cabinets no one but me will ever see? (I mean, obviously I have no life.) No. But there’s something to be said for having an organized space look pretty too. It only took me five minutes for each one, so it wasn’t too bad.

storm cloud gray

I only had to do one coat each too – which totally surprised me. The paint is the SW Duration kind and it covered great.

After it was dry I did a super quick purge and then loaded everything back in. I have a cabinet for holiday stuff:

organizing holiday dining items

One for vases/pitchers/birthday party supplies (there’s no rhyme or reason to this as you can see):

organizing serving ware

One for random serving stuff, with room to spare:

organizing serving dishes

I have more in the kitchen that will fill that space, don’t you worry. ;)

And finally, one dedicated to dishes. My vintage glass plates (from Goodwill) for showers and small get togethers, our white dishes for big meals and some serving plates and linens as well:

organizing serving dishes

And, I gotta say, it doesn’t ever get any less weird that I share the insides of our drawers and cabinets with you, even after five years. ;)

It is SO GREAT to have a spot for all of this stuff! Most of it was in the basement before – now I like having it close by in a pretty spot:

DIY built ins using cabinets as basesI still LOVE how this all came together. So very much.

We’ve lived here for nine years and I feel like I am on the cusp of having a good spot for everything – it’s taken that long. If you’ve been around for awhile you know I have to live with things for some time before making them right for us – the same goes for how I (try to) organize the STUFF in our house.

How do you organize all the dining stuff you rarely use but want to keep? :) Or do you use them often? I think I need to throw a party.

How to accessorize bookcases

Well hello! I’m back today to share how the accessories on the bookcases came together. It was a long process (what about this project wasn’t??) and I gathered some of the items over months and months. Most of the accessories we already had, but it sure was fun to look for a few new pieces throughout this process!

Here are the bookcases again as a reminder:

DIY built in bookcases

First I’ll go through some of the pieces, and then I’ll explain how I pulled it all together!

Of course I wanted the items to have a “library” feel, so that was most important to me throughout the process. Almost all of the “new” (I’ve picked up items since January) accessories were found at local antique/thrift shops.

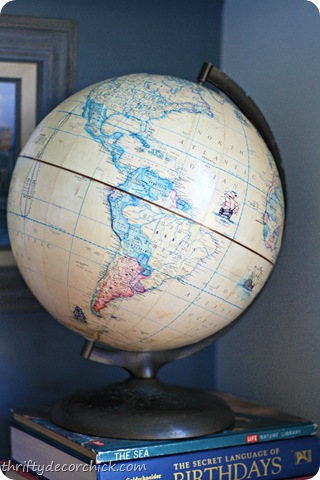
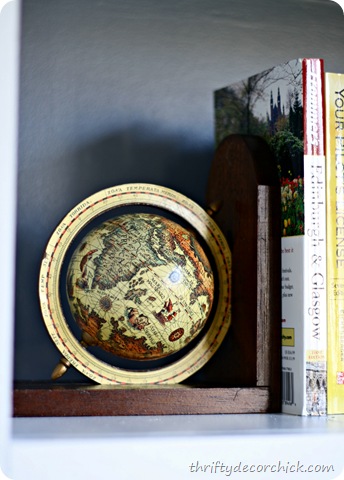
I loved the colors on this globe – they work with he room perfectly! The background color ties in with the walls in the room and the blue works with the backs of the built ins:

accessorizing bookcases

I had a globe from my childhood that I could have used, but my STINK sister took it. She swears it’s hers and I swear she’s WRONG. :)

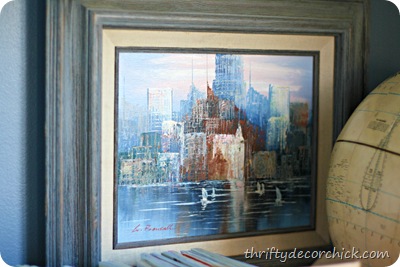
This art was a more recent find and I was so thrilled when I found it!:

accessorizing bookcases

It’s an actual oil painting of a skyline and it reminds me of NYC. It was only $20 (which I thought was incredible for a real painting), I think because there was a sticker stuck to part of it. I was able to get it off with tweezers and it looks brand new! The frame was like that too – perfect!

When I shop for ANY accessory, I love finding things that mean something to us as a family, and the NYC painting is certainly one of those.

I brought in more globes with these bookends I found at a thrift shop:

globe bookends

They were going to get a paint job but I didn’t want to do it after all that work. Now they’ll stay as is. :)

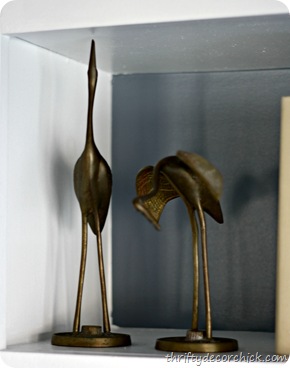
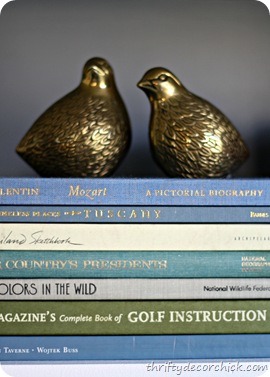
I added quite a few metal pieces, the fat quails (?) were from Goodwill, the pretty cranes were from a thrift shop:

 accessorizing bookcases accessorizing bookcases

There were a few small DIY projects, including the little set of drawers that I showed you here:

CeCe Caldwell paint

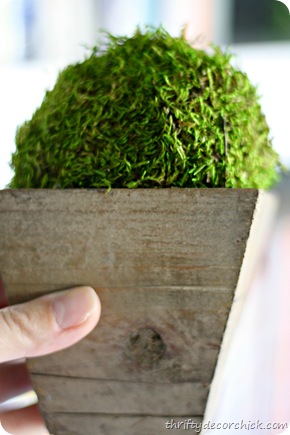
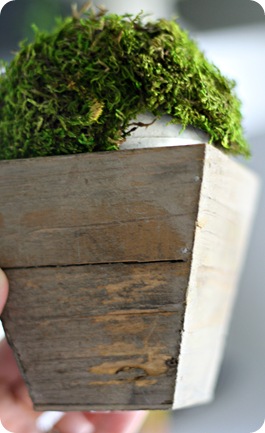
I filled my little wood pots by just covering Styrofoam balls with moss sheets:

DIY moss topairies

I just cut pieces of the moss off and hot glued it on. I didn’t worry about the backs:

 DIY moss topairies DIY moss topairies 

I don’t mess with the backs or the insides of things. :)

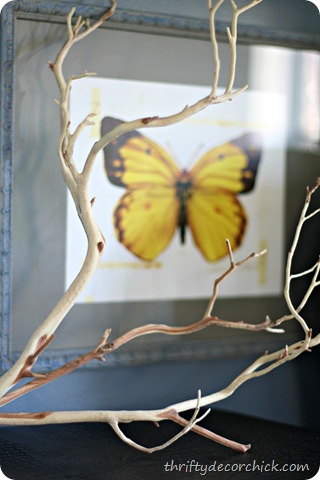
The butterfly art was a poster I cut up and framed years ago. I just painted the frame and mat with the chalk paint I used on the set of drawers above:

accessorizing bookcases

You may remember the butterflies from my old laundry room years ago:

black and yellow laundry room

I added a little tiny bit of sapphire Rub n Buff to the frame to bring out the texture – the sapphire is such a pretty color!

The faux leather box used to sit in the bedroom (I shopped the house!) and the fat topiary (that I adore!!) was one of my only new purchases, like from a real store. ;) I got it at one of my favorite local nurseries:

accessorizing bookcases

Most everything else was ours already. :) I was surprised we had so many books! I did pick up just a few more at Goodwill, but I made sure they were all books we would actually read. It was fun to pick out some new ones. (For a fraction of the price!)

I take the book cover off my books so the pretty covers can be seen. I bought my very first design book to celebrate finishing the bookcases – I’ve never had one! (The Design Sponge book):

oil rubbed bronze cabinet hardware

Oh la la!! ;)

I used our paper back books too – we have too many of them not to!

As I’ve said before, sometimes accessorizing falls right in to place, sometimes it’s agonizing! :) Most of this fell into place nicely, it was only those bottom shelves that gave me fits:

DIY built in bookcases butcher block

As I went through the process, there were things that I repeated to make it more cohesive – first up were the metal pieces:

how to decorate bookshelves

The fan, the cranes, the bookends and the little fat birds were placed throughout.

I tried to space out the green items too:

how to decorate bookshelves

I even thought about which way to go with the books. I tried to switch back and forth – starting on the right, then left, right, etc.:

how to decorate bookshelves

Otherwise parts of the bookcases started to look “heavier” than others.

And I also thought about what to center on the shelves and what not to:

how to decorate bookshelves

The top and bottom items are all centered, and two of the shorter shelves in the middle are as well, on each end.

You know how you see those beautiful photos in magazines? Yeahhh, I can’t even imagine how many people and how long it takes them to get those perfect shots!

I’m just glad I have pictures of these, because I’ll need to refer to these when I need to put everything back after I decorate them for the holidays! The books will stay of course, but I plan to exchange a few accessories out.

So there. you. go. Whew! I hope that helps as you try to conquer your shelves or accessorizing in general. I’m certainly no expert but I do love how they turned out! If there’s something or an item you’re wondering about, please let me know and I’ll answer you in the questions.

Thanks again for all the love on this project! Now, onto that never-ending powder room project. :)